Broom Style Bonsai
Japanese name: Hokidachi
A note to beginners
The more you learn the more you realise these styles are not set in stone, and the rules surrounding bonsai are more like guidelines. Rules always have exceptions and they are broken nowhere more than Japan (Bonsai Heresy).
Yet we must begin somewhere, and the rules are a good place to start.
Contents
Broom style bonsai

The broom style gets its name from its similarity to an upside down Japanese broom. Formally, a straight trunk that divides a third up the tree into multiple branches growing diagonally upward from the trunk like a fan.
What species work well?

Source: Formal broom style
This style emphasises refinement and structure so species with fine branching work well. A favourite is the Elm (Ulmus) species such as the
Other species that work well are
Deciduous trees let you see the structure in winter but broadleaf evergreens also work. Not suitable for pines and junipers.
Examples in nature
A deciduous tree that has a broom style typically grows alone, without other trees around it. They can be seen growing in open spaces like fields or parks. The broom style means that the tree has many branches that spread out from the trunk, like a broom. The tree looks natural and balanced. Here are some examples:
-920c0ad8de3cffa10df4387352ef127e.jpg)
-3d7a75c480d80a7e4b5443892bdc061d.jpg)
-422674b65605fe32b4dea026e5aa7beb.jpg)
-c83631ae7e84cc05afb157104d4ad8f2.jpg)
Source: Ulmus americana ‘Princeton’
-002254c2695b0603dc72f6ff2c188f9c.jpg)
Source: Dutch Elm
Generating examples for your bonsai
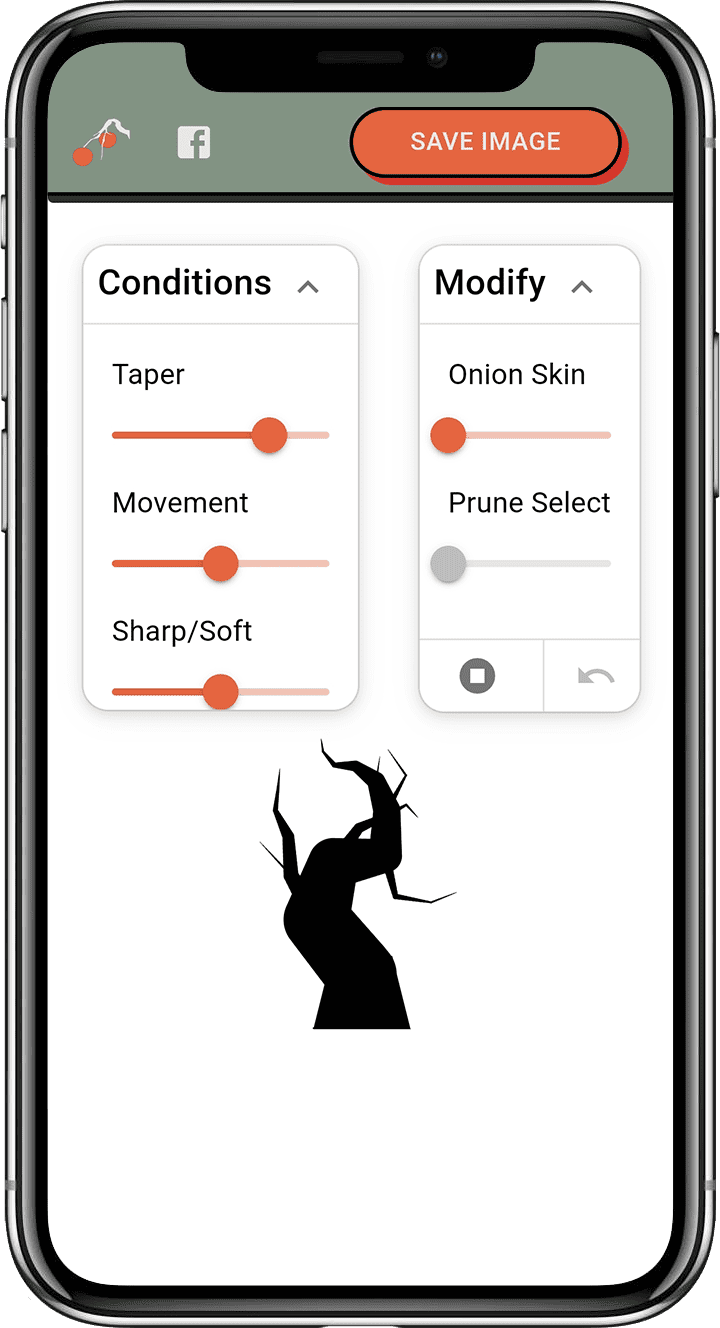
Bonsai Composer is a tool that generates trees based on your preferences. You can adjust the movement, taper, direction, and more.
You might be able to find a tree that inspires you.
Try Bonsai ComposerDifferent broom forms
The broom style has many forms. They are formal, informal and trunk continuation. The branches start in different ways, but after that they are generally trimmed and shaped the same.
Source: Formal broom style
Formal
The straight trunk splits into several branches at a point about one-third of the way up from the base. The branches grow outwards and upwards, forming a fan-like shape. The tree may have inverse taper at this branching point, which means the trunk is thicker above than below. This is not a flaw but a feature of the style.

Source: Walter Pall
Informal
A tree without a straight trunk styled into a broom. Its branches may not originate from a single point on the trunk (unlike the formal form). Although similar to "trunk continuation", there is an obvious visual difference.

Source: Kimura's Broom
Trunk continuation
The tree has a single trunk that goes all the way to the top. The branches grow out of the trunk at different heights. The branches near the bottom are more flat and become more slanted toward the top.
Examples from Master Kimura
When I visited Japan in 2023, Master Kimura had three shohin broom style bonsai. A formal, informal, and trunk continuation form of the same species and age. It's a great opporunity to see how the forms vary.

Trunk continuation

Formal

Informal
What makes a good candidate
Straight trunk
Straight trunks are flaws in many styles but a feature of the broom style. If you are considering trunk chopping a straight trunk to add movement, pause and consider its potential as a broom.
Inverse taper
A broom style is a good option for a tree with inverse taper. This is when the trunk is thicker at the top than at the bottom. It is a flaw for many styles but a occurs in broom style because of multiple branches growing from the same point.
Beginner
In my opinion, broom style bonsai are a great option for beginners because they get you practicing a lot of techniques and:
- The species are quite forgiving
- They have multiple flushes of growth
Some of the techniques and concepts you get exposed to:
- Clip-and-grow
- Guide-wiring and some wiring
- Balancing growth
- Creating taper
- Fertilising and water control
- How to treat a young vs old tree
- Partial /full defoliation
Some reasons against broom style bonsai for beginners are:
- Can be hard to wire as branches are brittle when not young
- They are tricky to execute well
Although many would say broom style bonsai are not for beginners, beginners should prioritise practice. You must ask yourself what your current goals are. Is it to create a museum quality tree or to learn and practice as much as possible?
If people only practiced on trees with "thick and old enough trunks to make a great bonsai", no one would have any experience. People can get too hung up on that especially when starting out.
How to make a broom style bonsai
There are several methods used to make a broom style bonsai. The difference is in the setup of the branching. After that the clip and grow technique is used the same for all of them.
There are limited instructions online for creating broom style bonsai. Here is a list of resources that demonstrate methods other enthusiasts have used.
- How to prune - Blue Sky Bonsai
- Pruning and Carving - Blue Sky Bonsai
- Initial Styling - Baikoen Bonsai Club
- Progression and Inspiration - Walter Pall Bonsai Adventures

Source: Sacrificial branch
Starting from a young tree
- Use wire or a stake to grow a straight trunk
- In your mind, pick and ideal final height for your tree and note the point one third up the trunk.
- Let the apex grow to thicken the trunk. Leave buds and branches grow around that one third point (and at the apex for growth).
- You can start wiring these branches at a diagonal elongating like a broom.
- Once the desired trunk thickness has been reached you are ready for a chop.

Source: Pruning broom style
Formal style
- Trunk chop the tree above a set of buds/ branches 1/3 up the trunk
- After making a trunk chop it is common to get a lot of branching from the wound or close to it. You can use these as the new branching
- Wire these branches at a diagonal elongating like a broom
- Let these branches elongate until the desired thickness is reached. Then cut them back to add taper and ramification.
- Let secondary branching elongate to fill out the broom form and repeat step 3. Note: This process is known as clip and grow technique
- The main focus is to get all the branching at similar fineness. Any overlly thick branching should be pruned to become finer. Overly thin branching should be allowed to grow out to thicken.
Improving your designs
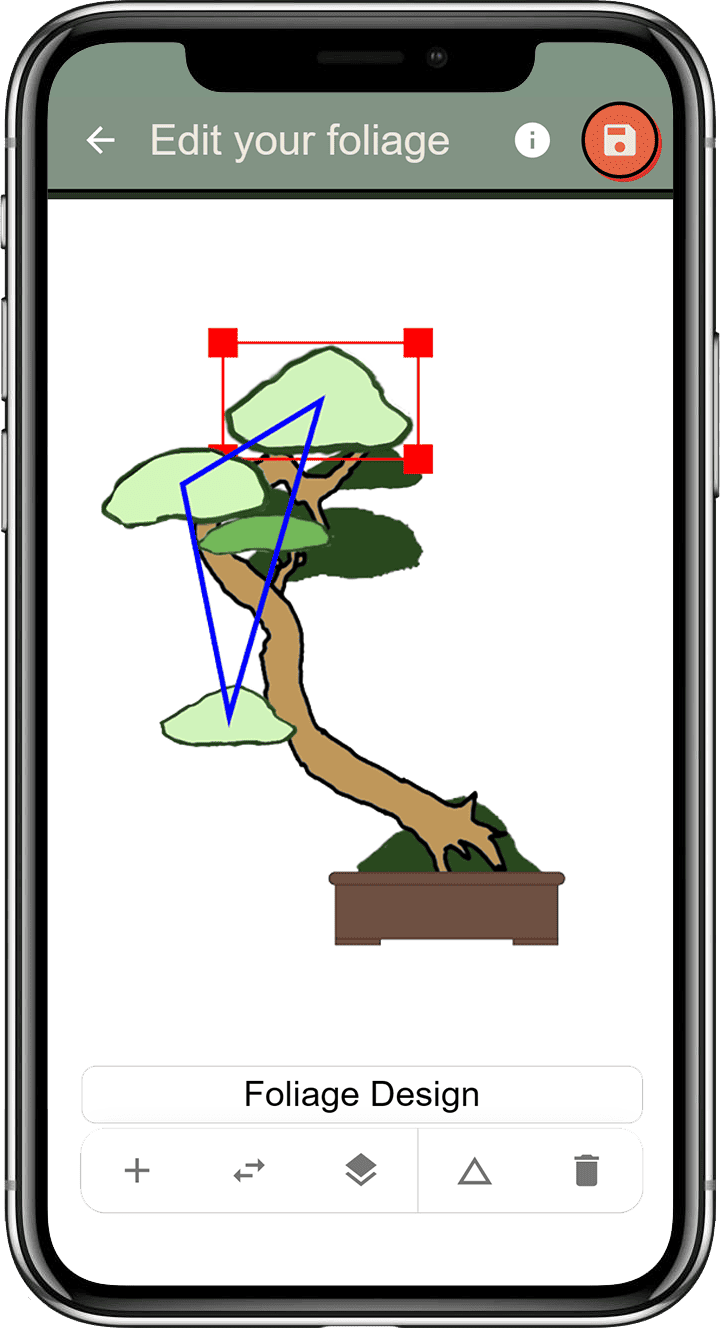
Bonsai Designer is a tool to help you practice, experiment, and improve your design over time no matter the style. You can upload a picture of your tree, experiment with various orientations, styles, deadwood, and foliage combinations.
The designs you create are saved online so you can compare and revisit them.
Try Bonsai DesignerSelecting a bonsai pot
The tree and its pot work together to create bonsai. Important factors to consider are the color, size, shape, and feet.
Color
Broom style trees are deciduous or broadleaf evergreens so a glazed pot is chosen. The glaze colour can be any shade that suits your preference. Some people like to match the colour of the flowers or the leaves, while others prefer a contrast. Blue is a classic option that creates a harmonious look with the green foliage.
Size
The pot and the tree have a balanced relationship. The pot is as tall as the tree's trunk, but not as wide as the tree's branches. This way, the tree can spread its leaves over the pot and create a beautiful contrast.
Shape
Broom styles are usually associated with a more feminine energy - they have smooth bark and thin branches. This makes them suitable for oval or lotus pots that highlight their delicate and detailed features.
Feet
The bottom of a pot is an important feature that affects its appearance and function. Different pots have different kinds of feet, which determine how much space there is between the pot and the surface it rests on. Small feet create more space, which gives a sense of lightness and movement, but also less stability. Large feet create less space, which gives a sense of solidity and heaviness, but also more stability.
Broom styles have a visual impression of stability and harmony. Large feet can enhance this effect by providing a strong base for the tree. Brooms also have interior space (first third on both sides of trunk), which can be accentuated by small feet to contrast with the foliage.
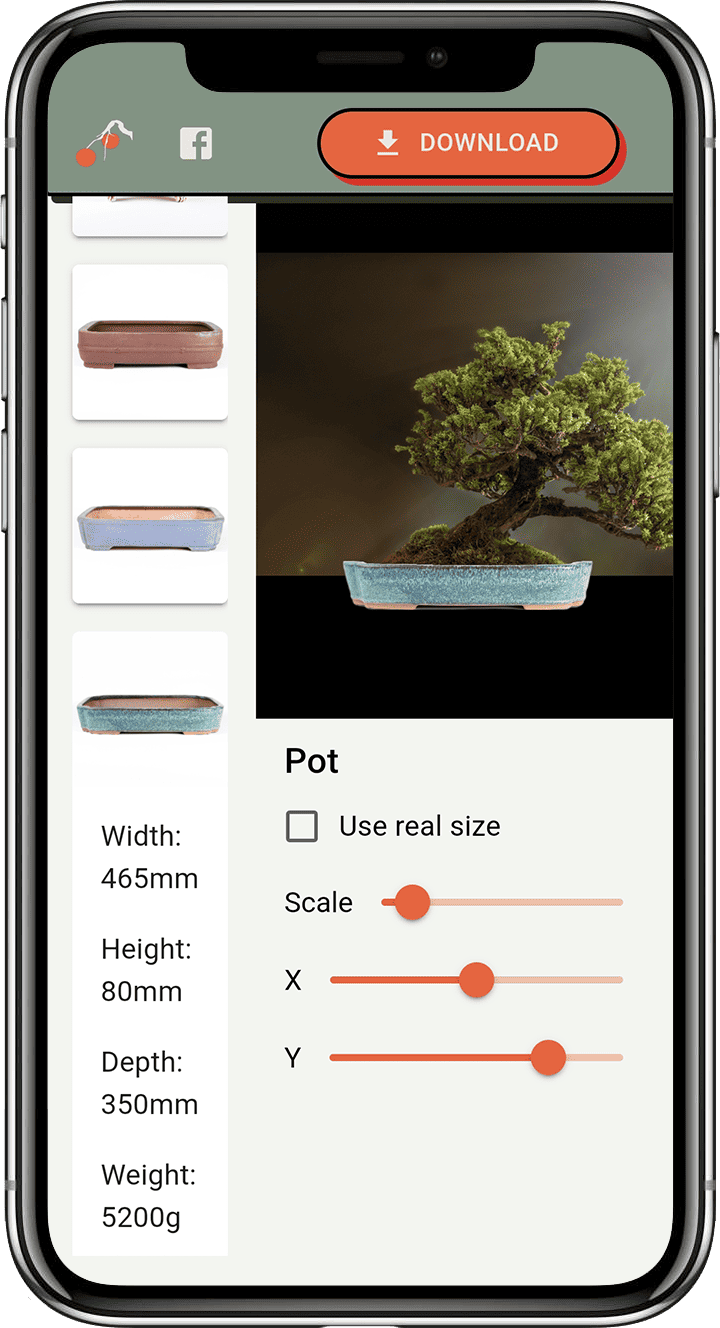
Try different pots on your tree
Finding a pot that matches your bonsai can be hard and you often don't know until you try. That's why we created a tool that lets you try different pots with your bonsai. Just upload a picture of your plant and explore over 100 options of shapes, colors, and sizes. Best of all, it's free!
Try pots online